
 0


- Home
- Blog
- Manufacturing Insights
- Sunglasses Sample Evaluation: A Checklist for Approving Samples
Sunglasses Sample Evaluation: A Checklist for Approving Samples
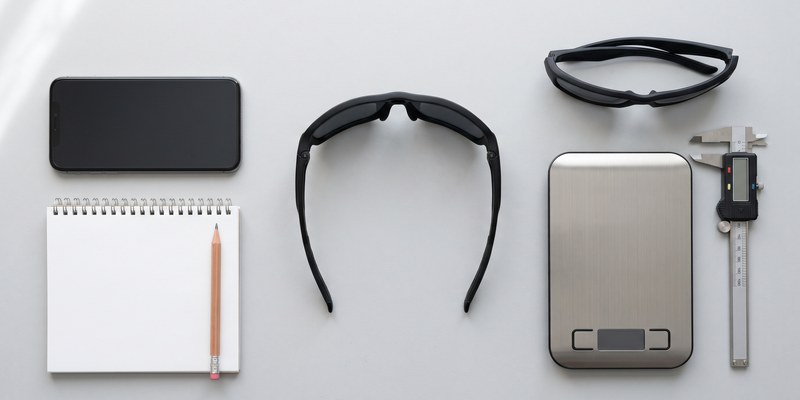
How to Evaluate a Sunglasses Sample: A Checklist for Brands
The sample stage is where a product is cheapest to fix and where most brands spend the least effort. A sample arrives, gets tried on by two people in the office, and comes back with a note saying “looks good, maybe a bit tight.” Problems that should have been caught then show up in the first production run.
A careful sample review takes an hour and can save a full sampling round, which in practice means two to three weeks. Here’s what to check and how to send feedback the factory can act on.
Know Which Sample You’re Looking At
Not every sample is meant to answer the same question. Judge each one for its purpose:
- Prototype (often 3D printed or handmade): checks shape, proportion, and fit. Don’t judge finish or colour on it.
- T1 / first-shot sample: the first parts from the production mold. Checks dimensions, fit, and how the design molds. Expect adjustments.
- Pre-production sample: made with production materials, colours, lenses, and branding. This is the one to judge in full detail.
- Approved (golden) sample: the signed-off unit every production piece is measured against.
Our development timeline guide explains where each one falls in the process. The most common mistake is approving a pre-production sample on a quick look because the earlier samples were fine.
1. Fit — On More Than One Face
Fit is the reason most frames get returned, so test it properly.
- Try it on several people, ideally with different head widths, nose bridge heights, and face shapes. One person’s opinion tells you very little.
- Wear it for at least 20 to 30 minutes. Pressure points behind the ears and on the nose take time to show up.
- Move. Look down, shake your head, jog on the spot. For sports frames, test in the activity’s positions: a cycling frame in a riding position, a golf frame looking down at address.
- Check with a cap or helmet if the target customer will wear one.
- Check nose bridge fit for each target market, since bridge geometry varies, as covered in our frame geometry guide.
2. Alignment — The Flat Table Test
A frame can look fine and still be bent or twisted. Opticians use a simple check:
- Open the temples and place the frame upside down on a flat table, resting on the top of the frame front and the temples. All contact points should touch evenly. If one temple is lifted, the frame isn’t aligned.
- Look down at the frame from above. Both temples should open to the same angle.
- Look at the front from the side. Both lenses should sit at the same tilt.
A misaligned frame on the sample will usually mean misalignment in production unless it’s corrected now.
3. Optics — Look Through the Lens
Optical defects are easy to miss if you only look at the lens rather than through it.
- Look at a straight line through each lens, such as a door frame or the edge of a building, and move your head slowly. The line should stay straight. Bending or swimming means distortion.
- Compare the two lenses. Tint, darkness, and mirror finish should match between left and right.
- Check polarization by looking at a phone or laptop screen and slowly tilting your head. A polarized lens will darken the screen at one angle. Both lenses should darken at the same angle; if they don’t, the polarizing axis is misaligned.
- Check the lens edge and fit in the frame. No gaps, no stress marks, no rattling.
4. Finish and Colour
- Compare colours against your approved standard under consistent lighting, ideally daylight or a light box rather than office fluorescents.
- Check every part matches: front, temples, nose pads, and rubber parts can be different materials that take colour differently.
- Look for cosmetic defects: flow lines, sink marks, scratches, flash at part lines. Translucent frames show these most, as covered in our frame finishes guide.
- Check soft-touch and painted areas for even coverage, especially at edges and hinges.
5. Hinges and Hardware
- Open and close the temples 20 or 30 times. The action should stay smooth and consistent.
- Check hinge tension. Temples shouldn’t flop open or feel stiff.
- Check for play. A temple that wobbles at the hinge on a new sample will be worse after a month of use.
- For spring hinges, check they return cleanly. Our hinges and hardware guide covers what to look for.
- For interchangeable lenses, swap them several times and check they seat securely every time.
6. Branding and Packaging
- Check logo position, size, colour, and sharpness against your artwork. Fine detail often fills in or breaks up at small sizes, as covered in our branding methods guide.
- Rub the logo with a thumb a few dozen times. Printed logos that smudge now will wear off quickly.
- Check inner temple markings: model number, size, compliance marks, and country of origin.
- Check the full packaging set: case, cloth, box, inserts, and labels, including barcodes your retailers require.
7. Weight and Feel
Weigh the sample on a kitchen scale and compare it with your target. Then simply hold it: does it feel like the price point you’re aiming for? This is subjective, but it’s how your customer will judge it too.
8. Testing and Compliance
The pre-production sample is the right moment to run certification testing: UV, impact, optical quality, and any market-specific requirements. Testing after mass production risks the whole order. A manufacturer with an in-house testing lab can turn this around quickly.
How to Give Feedback That Works
The way you send feedback affects how fast the next sample arrives and whether it’s right.
- Send one consolidated list, not a stream of separate messages from different people.
- Number every point, so each one can be confirmed or answered.
- Use photos with markings showing exactly where the issue is.
- Be specific. “Temple too tight” is hard to act on. “Pressure behind both ears after 20 minutes on a 60 cm head” can be fixed.
- Separate must-fix from nice-to-have, so the factory knows what’s blocking approval.
- Decide in one round. Changing direction across several rounds is the most common cause of delay.
- Approve in writing and keep the signed-off sample as your reference.
Where Tony Optical Fits
We supply samples at each stage of OEM/ODM development, with in-house production and testing so that the pre-production sample reflects what mass production will actually deliver. We work through numbered feedback lists with our customers and keep a signed golden sample on file for every approved style, so later production runs are measured against the same reference.
Frequently Asked Questions
How long does a sunglasses sample round take?
It depends on the stage. Prototypes can take about a week, while samples from new tooling take longer. Fast, consolidated feedback is the biggest factor you control.
How many people should test a sample for fit?
Several, with different head sizes and face shapes. One person’s fit tells you little about how the frame will suit your customers.
How can I check if my sunglasses lenses are polarized correctly?
Look at a phone or laptop screen and tilt your head. Both lenses should darken at the same angle. If they don’t, the polarizing axis is misaligned.
What is the flat table test for sunglasses?
Place the open frame upside down on a flat surface. All contact points should touch evenly. A lifted temple means the frame is out of alignment.
When should certification testing be done?
On the pre-production sample, before mass production starts.
What is a golden sample?
The approved, signed-off sample that every production unit is measured against. Both brand and factory should keep one.
Final Thoughts
Samples are the cheapest point to get a product right. Brands that test fit on several people, check optics and alignment properly, and send clear, numbered feedback get to an approved product in fewer rounds, and their first production run looks like the sample they signed off.
Developing a new style? Get in touch with our team to discuss sampling, timelines, and how we work with you through approval.


Article Classification
Recent Articles
- Sunglasses Mold Tooling: Cost, Cavities, Steel & Ownership
- Sunglasses Mold Tooling: Cost, Cavities, Steel & Ownership
- Sunglasses Sample Evaluation: A Checklist for Approving Samples
- Sunglasses Hinges & Hardware: Types, Failures & Specification
- Custom Logo Sunglasses: Branding Methods for Private Label